Friday 16 April 2021

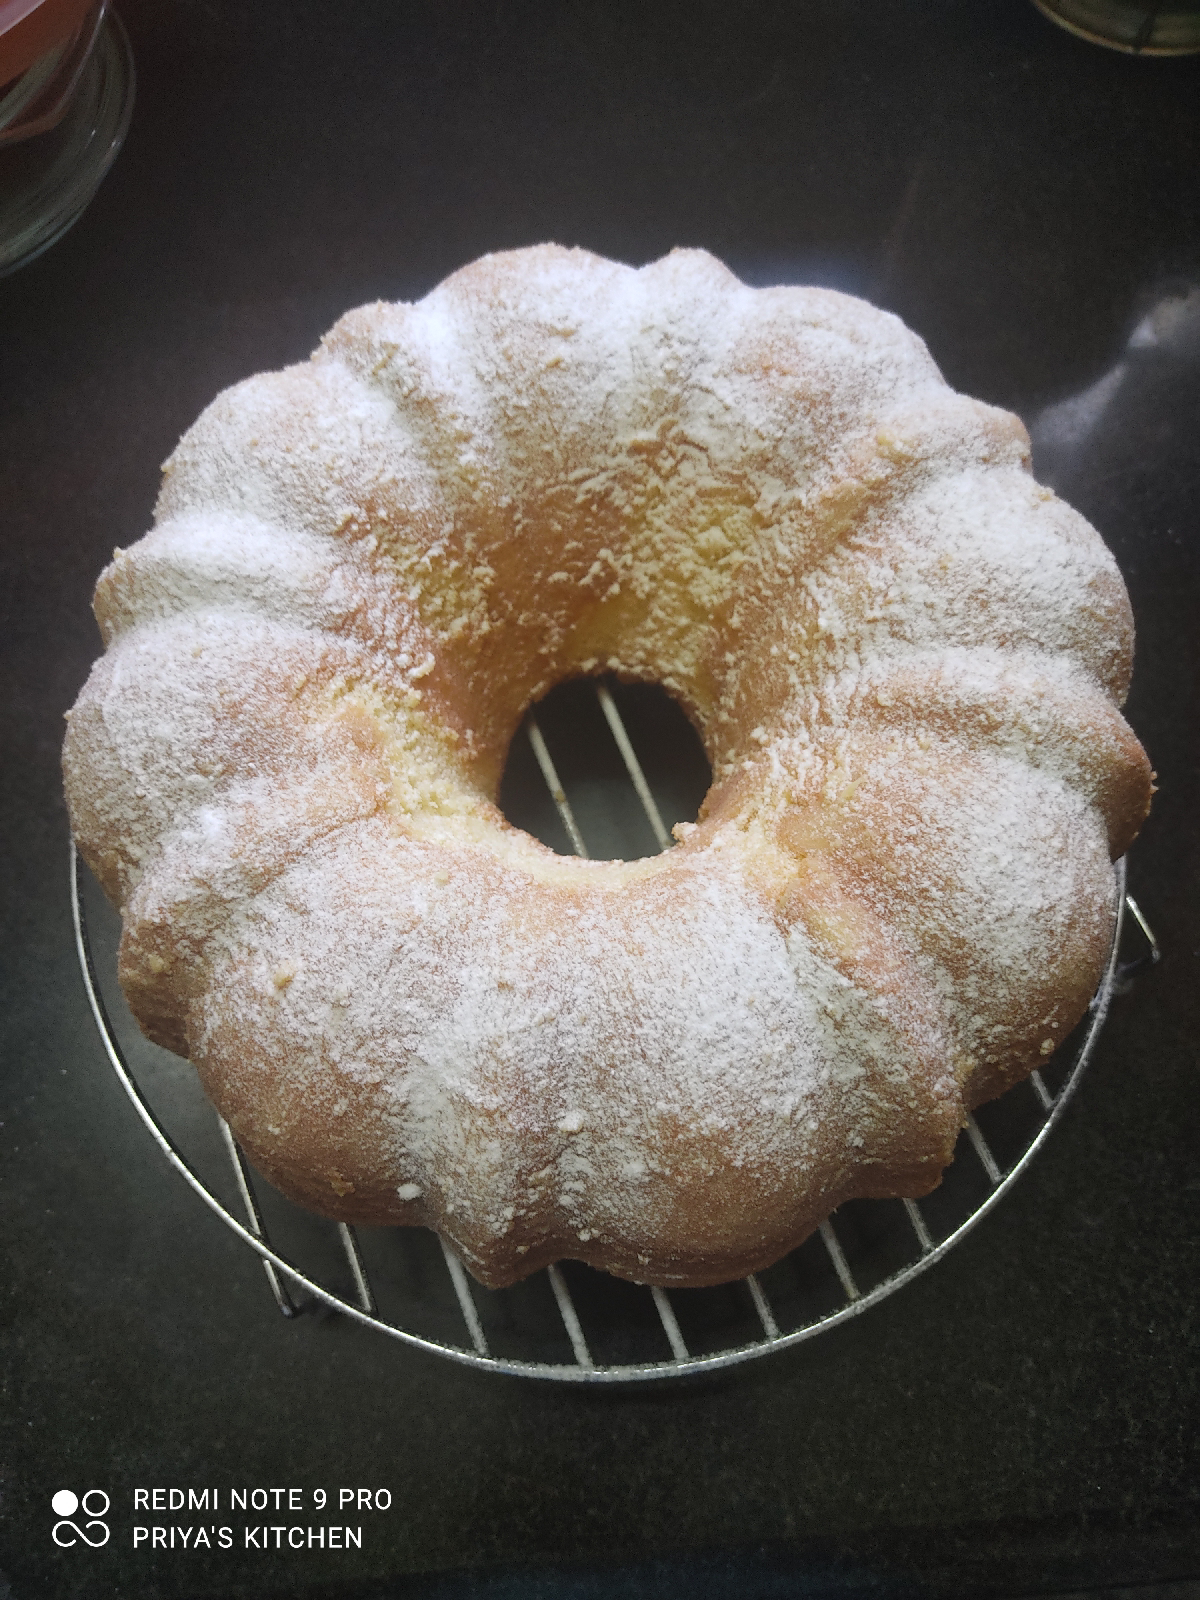
Buttermilk Pound Cake


Pound cake was my very first large cake baked as part of group baking assignment. It was my first bake in a silicone pan and I had some challenges with the mixing. I did not own an electric mixer then. And still it turned out pretty good. I was mighty proud of the attempt. 

After that I baked a condensed milk pound cake that I was not very happy about. I never got around to baking another pound cake again. 

So when I came across this recipe I was intrigued. This was a bundt cake and I loved the texture. But the size of the cake and the mixing was daunting. My daughter saw my bookmarked recipe on my phone one day and said "Ma! bake this today" and off she trotted away. I did not have a chance to respond at all. 

It is amazing how these little ones have us wrapped around their little fingers and before we know it, we are dancing away to their tunes. So yes that Saturday turned into a Mamma's baking day. 

Recipe (Makes one large bundt cake)

Ingredients
Unsalted butter at room temperature - 1 1/2 cups (340g)
Sugar - 1 3/4 cups 
Eggs, at room temperature- 6
Vanilla extract - 1 tbsp
Butter milk (at room temperature) - 1/2 cup 
Baking powder - 1tsp
Salt - 1/4 tsp
All purpose flour - 2 3/4 cups 
Powdered sugar - for dusting

Method

Preheat the oven to 350degrees F (180 degrees C)
Generously grease and dust a large (10 inch) bundt pan. Dust off the excess flour and keep the pan aside.

Cream the butter and sugar for about 5-7 minutes until light and fluffy. 

Beat in the eggs one at a time, beating well and scraping down the sides of the bowl between each addition. After all the eggs are added, beat again for about 2-3 minutes.

With the mixer on low, add the vanilla extract, baking powder and salt. 

Now alternately add the buttermilk mixture and flour, starting and ending with the flour. Mix until no dry flour remains. Do not over beat. 

Spoon the batter into the prepared bundt pan.


Bake at 180 degrees C for 20 minutes. Without opening the oven door, turn the temperature down to 160 degrees C and bake for another 25-30 minutes. Insert a toothpick diagonally into the cake and pull it out. The toothpick should not have wet batter on it. 

If you find the top browning too quickly in the second half of the baking time, then cover with a foil and continue baking. 


Allow the cake to cool off in the pan. Run a flexible knife around the edges and then invert the cake onto a wire rack. 
Dust with icing sugar or fine powdered sugar. Slice only when the cake feels completely cool to touch.  

The cake keeps well at room temperature in an airtight container for 3-4 days, if it lasts that long that is. My kids did not wait to for the cake to completely cool down. And they had it for breakfast and evening snack for the next couple of days. I do not have to think twice about using my large bundt pan anymore 😊

Verdict The texture was just perfect in this cake. I guess the beating with the electric mixer did matter. I felt it was a bit too sweet. I will try cutting down the sugar a bit the next time. 


Wednesday 14 April 2021

Masala Bati


I heard about dal bati from my colleagues while on a work trip. The apartment that were put up in had the built-in hob and oven unit. They mentioned this Rajastani dish where the same atta we use to make roti can be baked and dunked in ghee to be served with dal. That was more than 10 years back.

I wanted to try this since then. But I as apprehensive and kept postponing. Finally after 10 years, I decided to bite the bullet and bake it one weekend. But I decided I should try a stuffed bati recipe. And boy was I wrong for not trying this out earlier. They were delectable. 

The internet has made culinary experiments a lot easier. There are tons of recipes out there, that we don't have enough days to try all these out. Thanks to one such recipe I came across for Masala bati, I had no trouble baking these. But while trying recipes for the first time I am always a nervous wreck. I kept my fingers crossed and waited for 40 minutes while these were baking in the oven. I was able to catch my breath only when I was able to dunk the baked batis in ghee, and taste one of them. Finally a sigh of relief while I called out to my food taster (my elder daughter). And she downed two of these immediately. 

Recipe (makes 12 batis)

Ingredients
Masala Bati 
Whole wheat flour -  2 cups
Semolina (Sooji) - 1/4 cup
Ajwain - 1/2 tsp 
Salt - 1/2 tsp
Baking powder - 1 tsp
Baking soda - 1 tsp
Ghee - 3 tbsp
Water - 1/2 cup warm for kneading dough


Masala stuffing for the Bati
Oil - 2 tbsp
Potatoes - 4-5 medium sized peeled, boiled and cubed
Green peas - 1/2 cup (cooked)

Roast and Pound together:
Cloves - 5
Peppercorns - 8
Coriander seeds - 1 tsp
Cumin seeds - 1 tsp
Asafoetida (hing) - 1 pinch
Ginger - 1/2" piece
Green chillies - 2 finely chopped

Spices:
Red chilli powder - 1/2 tsp
Turmeric - 1/2 tsp
Garam masala - 1/4 tsp
Coriander powder - 1/2 tsp
Amchur (dry mango powder) - 1 tsp

Method

For the Bati dough:
For making the dough, add whole wheat flour, semolina, salt, baking powder, baking soda, carom seeds (ajwain), oil/ghee to a bowl. If using ghee, melt the ghee and let it cool down before using. 
Mix it by rubbing and massaging the flour and ghee using your fingertips. You need to keep mixing until it resembles breadcrumbs and retains its shape.
Add warm water and knead into a firm dough. The dough should not be soft like roti dough. It should be like the puri dough. 
Apply little oil/ghee on the prepared dough and keep it covered for 30 minutes.

For the Stuffing:
Boil the potatoes, peel the skin, dice and keep aside. Boil the green peas, drain the water and keep aside.
Dry roast cloves, peppercorns, coriander and cumin seeds and allow them to cool down. Pound the roasted spices into a coarse powder. Add a pinch of hing to the pounded spice mix. 
Pound ginger and green chilli into a coarse paste. 

Heat a couple of tablespoons of oil in a heavy bottomed pan. When the oil is hot, add the pounded spices and when the mix crackles, add the ginger and chilli paste. 

Next add the chilli powder, garam masala, coriander powder, turmeric and Amchur. Mix and saute well for a minute or so. 

Add the potatoes and green peas and mix well with the spices. Saute until well combined. Transfer the masala to another plate and let it cool completely. 

Once cooled, roll the masala into 13-14 uniformly sized balls and keep aside. 

Shaping the Batis:

Once the bati dough has rested for 30 minutes, make 13-14 uniform sized balls. Roll into a 2-inch diameter circle. Place the stuffing in the center and close the disc, pinching the edges to make a ball. 

Repeat this with the remaining 13 balls of bati. Place the batis in a bowl covered with cling wrap. 


Baking the Batis:

Preheat the oven to 170degrees C. Arrange the batis in a tray or roasting plate. Brush the batis with some melted ghee. Bake for 30-40 minutes until the tops are golden brown and crisp.


Pull the tray out of the oven and dunk the batis in melted ghee for a minute and place on the serving tray. 


Serve hot with Dal. Or just stuff your face with one or two when they are piping hot :). It is upto you. 

Verdict

I really regret not trying this out earlier. These make such awesome meals, let the size not fool you. It is dunked in ghee remember? and stuffed with aloo too. So just a couple of these bad boys with dal will fill you up. My elder one preferred eating the batis plain. She has requested me to make this again. I plan to make this occasionally for a change from the usual stuff.  


Friday 9 April 2021

Dal Pancharatan


The good old comfort food - dal chawal. And how many variations of dal are possible. Each lentil has a unique taste. My personal favourite is the green moong dal. Given the variety of lentils, it also means there are multiple permutations we can have. How about we combine five delicious lentils? Sounds good to me!

In this recipe I used equal proportions of toor, masoor, yellow moong, green moong, channa dal. You can replace the yellow moong with the black urad dal as well. I believe the original recipe uses the mot dal as one of the five lentils. But I usually do not have it on hand, so I went with the above combination. 

Recipe (makes 6 servings)

Ingredients
Toor dal - 2 tbsp
Masoor dal - 2 tbsp
Yellow moong dal -  2 tbsp
Green moong dal - 2 tbsp
Channa dal - 2 tbsp
Onions - finely chopped - 1 large
Tomato - finely chopped - 1 large
Green chillies - slit - 2
Salt- to taste
Coriander powder (dhania) - 1 tsp
Pepper - 1/2 tsp
Curry leaves - 5 leaves
Cumin - 1 tsp
Oil - 2 tsp
Coriander - finely chopped - 1 tbsp

Method
Wash and soak the dal for 20 minutes.
Add sufficient water and boil the dal in the cooker until soft and mushy.
Use a wooden ladle to mash the boiled dal. 
Heat oil in a heave bottomed vessel. Add curry leaves, green chillies and cumin. When the cumin seeds splutter, add the onions and saute. Add turmeric and continue frying until transparent. Add the tomatoes and fry until soft and mushy. Add the coriander powder, pepper and salt. Add the dal and sufficient water for the right consistency, and let it come to a boil. Close the lid and let it simmer for about 5 minutes. Switch off the flame and add coriander leaves to garnish. Server hot with rice or roti. 


Verdict
This goes well with roti or rice or even dal bati. 

Tuesday 6 April 2021

Instant Rava Idli


Sunday breakfast is a tough choice. There is enough time to cook something elaborate, but it is also alluring to make something quick, so I can have a relaxed weekend. Sometimes I just pick a simple but great tasting recipe that serves me just right. This one I picked from Hebbar's kitchen fit the bill. In addition, I made the sooji mix on Saturday night, so it is ready for me to soak on Sunday morning for the batter. 

Recipe
Ingredients
Sooji - 1 cup
Ginger - 1/2 inch, grated

Curry leaves - 10, chopped
Mustard seeds - 1/2 tsp
Cumin - 1/2 tsp
Channa dal - 1/2 tsp
Green chilli - 1 finely chopped
Oil - 3 tsp
Asafoetida - 1 pinch
Turmeric - 1/4 tsp

Curd - 3/4 cup 
Salt - to taste
Water - 1/2 cup 
Coriander - 2 tbsp
Carrot - 2 tbsp grated
Eno (fruit salt) - 1/4 tsp

Method

Heat the oil in heavy bottomed pan. When the oil is hot, add the curry leaves, mustard, cumin, channa dal, green chilli, ginger, asafoetida. When the mustard starts to sputter, add the sooji and fry on a low flame, add the turmeric and continue frying until the raw smell goes. 

Allow the Rava mixture to cool down and store in an airtight container. 

The next morning, in a bowl, add 3/4 cup of curd to the rava mix. Rest for about 10-15 minutes, to allow the rava to soak the moisture. Add the salt and water make a batter like consistency. 

Add the Eno, just before pouring the batter onto the idli plate. 

Steam the batter on a greased idli plate for about 15-18 minutes.  

Allow to cool on the idli plate for about 5 minutes. Remove the idlis with a sharp spoon. 

Serve hot with chutney. 

Verdict
These taste very good, a must have recipe for quick breakfast. 

Sunday 4 April 2021

Crispy Fried Chicken

The kids have named it MFC - Mamma's Fried Chicken. Necessity is the mother of invention - isn't it? 
When the kids were looking for some fried chicken instead of the regular chicken curry, I was very apprehensive. However I decided to give it a try after checking a lot of recipes online. 

I always marinate the chicken in yoghurt and spices before freezing it for use. 
So I just used the marinated chicken rolled it into flour and deep fried it in the kadai. 
I was apprehensive, however it turned out great and disappeared in no time.

Recipe
Ingredients
12 pieces - Marinated chicken preferably boneless and leg pieces
1/2 cup - maida or corn flour
1 tsp - salt
1 tsp - pepper
Oil - for frying

Method

Mix the maida, salt and pepper an spread on a plate.
Heat the oil in a heavy bottomed iron wok/kadai. 


When the oil is hot enough, roll the chicken one piece at a time in the flour mixture, and gently drop it into the kadai.

Allow the chicken to fry well until the sizzling softens and then flip the pieces over. Again wait until the sizzling softens to remove the pieces from the kadai and drain the excess oil on a kitchen towel. Serve hot. 

Verdict
There are a few tips to keep in mind. Cornflour works better than maida. It yields crispier chicken. Wait until the oil is hot, before you drop the chicken into the oil. Use a heavy iron kadai. This helps maintain the oil temperature constant. Keep the flame on medium-low throughout. Do not tweak the flame inbetween. Avoid flipping over the chicken before the sizzling softens. Lastly, announce to the kids that the chicken is ready only when you have a plateful ready to serve.

Friday 2 April 2021

Whole-wheat biscuits


Emboldened by my earlier success with wholewheat scones, I decided to bake these biscuits with whole wheat flour. 

Here is the recipe.

Recipe
Ingredients
2 1/2 cups of wholewheat flour
1 tbsp - granulated white sugar
1/2 tsp - salt
2 1/2 tsp - baking powder
1/2 cup (113g) - unsalted butter cold
3/4 cup - whole milk (cold)
1 - large cold egg (lightly beaten)

Method

Preheat the oven to 200 degrees C, and line a baking sheet with parchment paper. 

Mix the flour, sugar, salt, baking powder and keep aside.

Cut the cold butter into the flour mixture. Blend using your fingertips, such that the mixture resembles coarse crumbs. Do not over mix or knead. 

Next add the cold beaten egg to the cold milk and add to the crumb mixture to mix with your fingertips until it just comes together. Roll or pat the dough into a disc about an inch thick. Using a lightly floured cookie cutter, cut discs and place on the prepared baking sheet. Brush the top of the biscuits with milk. Bake at 200 degrees C for 15-17 minutes. 

Allow the biscuits to cool down for 5 minutes on the baking sheet and then transfer to a wire rack to cool completely. 


Verdict
This was slightly less sweet than the scones. But they tasted great nevertheless. The texture was flaky and crumbly too. Yet another favourite of the kids now. 

Tuesday 30 March 2021

Wholewheat chocolate chip scones


During the pre-pandemic times, the demand and request to bake something used to be during the vacation time. But with the onset of the pandemic and the online classes, with kids being home through the year, keeping their eating habits healthy has been a challenge. So I started baking quick bites that last for a couple of days, and they started loving the home baked goods, that they started asking for newer baked goods. And I picked up this recipe for scones from my goto website for tried and tested recipes - joyofbaking.com

I just substituted a cup of wholewheat, to make it healthier and was keeping my fingers crossed that it would turn out fine and it did! So without further ado, here is the recipe.


Recipe
Ingredients
1 cup - whole wheat flour
1 cup - maida or all-purpose flour
1/2 cup (113 g) - cold unsalted butter
1 tsp - baking powder
1/2 tsp - baking soda
1/4 tsp - salt
1/4 cup - granulated white sugar
2/3 or 3/4 cup buttermilk 
1 tsp - vanilla extract

Method 

Preheat the oven to 200 degrees C and prepare a baking sheet with parchment paper. 

Mix the whole-wheat, all-purpose flour, sugar, baking powder, baking soda and salt.
Cut the cold unsalted butter into the flour mix. Blend the butter into the flour mixture with your finger tips. Use a light touch,  the mixture should look like coarse crumbs. 

I used curd and water in equal proportion to make the buttermilk. Pour the buttermilk and vanilla essence into the flour-butter crumb mixture and lightly make a dough. Again do not knead, if you want the scones to turn out flaky. Mix in the chocolate chips. 

Transfer the dough to a lightly floured surface and roll into disc about an inch thick. Lightly flour, a cookie cutter and cut into circles and place on a baking sheet. Brush the top of the scones with milk. 


Bake in a pre-heated oven at 200 degrees C for about 18-20 minutes.


Allow to cool on a baking sheet for about five minutes and let them cool completely on a wire rack. 


These are best when they are served a bit warm. But they do store well for a couple of days in an airtight container at room temperature. 


Verdict
These turned out so good that my daughters downed about two each when they were cooling down. And they wanted me to bake these frequently. They are mildly sweet and flaky. You could slice them in half and add butter or peanut butter spread if you prefer.


Sunday 28 March 2021

Flourless Eggless Banana Brownies

I came across this recipe on the google feed one day on my phone. Totally healthy, made with few ingredients - that is what made this recipe attractive. And I immediately book marked it.


Now all that was left was to have six ripe bananas to try it out. And about a month later, I had about 14 small yelakki bananas that I had to use up. So I decided to try this bookmarked recipe out.

Recipe (Makes 25 small bites)
Ingredients
6 - large ripe bananas (I used 14 small bananas - yelakki) 
1 cup - peanut butter (I used natural unsweetened peanut butter)
1 tbsp - honey
1/2 cup - cocoa powder (I used Hershey's)
Topping (optional)
1/2 cup - Chocolate chips
2 tbsp - Nutella/Hershey's spread

Method
Line an 8" square pan with parchment paper. Preheat the oven to 180 degrees C. 
Measure and blend all the ingredients together in a blender or food processor. Add a dash of water in case the peanut butter gets stuck. Natural peanut butter is sticky and can be very tricky to blend. 
Once you have a smooth paste, pour into the prepared 8 inch square pan. Spread the nutella/hazelnut spread if using. Sprinkly the chocolate chips if using. 

Bake for 15 minutes in the preheated oven at 180 degrees C. 

Remove from pan only after it has completely cooled. 

Cut into 5 cm square pieces. Store in an airtight container preferably refrigerated for a couple of days. 

                                          
Verdict
When just pulled out of the oven, the brownies look like they are not done. However as the pan cools down, it does harden up. These have a fudgy chewy texture. I think if you were to use Robusta Bananas, you can skip the honey.
I also think the Nutella/hershey's can be skipped. I plan to try with Robusta banana and skipping the Nutella spread on top. 


Thursday 4 March 2021

Carrot halwa

I am always fascinated by these slow cook recipes. But I am very reluctant to try it out. Take carrot halwa or Gajar ka halwa for instance. There is so much effort involved in grating the carrots, frying and then cooking them in milk until the milk reduces. Takes an hour or so. And at the end of all that labour and sore wrists with the stirring, you get about six servings which just vamooses as soon as it is served. Happy that all the effort has paid off, but there is nothing left for a second serving. Bittersweet feeling, right? 

Somehow I decided to bite the bullet and try this recipe. The trick to making good carrot halwa is to cook fry the carrots in ghee and cook them in the milk. I have a universal rule. All slow cook recipes, and those that need extensive cleaning, are to be tried out on Saturday afternoons. Not any other time, not any other day. It has to be a Saturday afternoon. That is the only time that works for me. 

So one Saturday soon after lunch, I started gathering the ingredients needed. Still butterflies in my stomach on embarking on this elaborate recipe. Bite the bullet, remember. 

Recipe (adapted from this recipe)

Ingredients
Carrots - 8
Ghee - 1/2 cup 
Milk - 1 litre
Milkmaid - 1/2 tin
Cashew nuts - 1/4 cup + Ghee 2 tbsp for frying
Mawa/Khoya - 1/2 cup

Method
Peel and grate the carrots. Heat a large frying pan and add the grated carrots. Add the ghee and saute until tender. Then add the milk and stir in. Keep stirring every now and then so the milk cooks the carrots and also reduces in the process. Have patience, it takes about half an hour to come to this consistency. 

Add the Mawa and the condensed milk. Keep mixing until all the milk is absorbed. Swich off the flame. 

Heat a couple of tablespoons of ghee and add the cashews. Roast the cashews until they are golden brown. Garnish and serve either warm or cold. 

Verdict
Truly worth the stirring and waiting, even if it leaves you with sore wrists. Totally worth it!


Homemade Peanut Butter


Peanut butter! That healthy awesome spread, a spoonful of that buttery goodness that is great for a snack. and that with bread makes a  proper meal. 

I have spent so much on buying jars and jars of these from the supermarket in the past year. I was always under the impression that you need a very powerful blender to make nut butter at home. I was wrong. Only for very smooth creamy peanut butter, you need to blitz it in the food processor or blender for about 5-6 minutes. 

However if you are good with slightly coarse peanut butter and don't want it as smooth as the store bought one, you can make it at home in your blender. 

Recipe
Ingredients
Raw Peanuts - 200g
Salt - 1/2 tsp
Olive oil - 1/2 tbsp
Honey - 1 tbsp
Groundnut oil - 1 - 2 tsp as needed

Method


Place raw peanuts on a roasting tray and sprinkle some olive oil and some salt. Preheat the oven to 180 degrees C. Roast the peanuts on the high rack for about 8-10 minutes. 


Allow the peanuts to cool. I like to keep the skin on for atleast half the roasted peanuts. That gives the peanut butter a lovely brown shade. 

Place the cooled, roasted peanuts into the smallest blender jar (chutney jar). Use the pulse function if available to make a coarse powder first. Then turn the blender on and grind to a fine paste. If the peanuts or the peanut paste sticks to the sides of the jar, stop the blender, open the jar and use the spatula to push them back. Add a teaspoon of groundnut-oil and start blending. Add a teaspoon at a time and keep blending, to ease the peanut paste into the blender jar blades. Avoid adding more than three teaspoons, else the spread will become too thin. Add the honey at the very end. 


Store the peanut butter in an airtight container in the refrigerator.


 Use it as a spread for bread, roti. Or just eat a spoonful as an evening snack. Works for me!


Verdict
I don't think I am going to buy peanut butter from the store anymore. Once roasted and cooled, it barely takes a few minutes to blend this at home. And you get to choose how sweet or salty you want your spread.